Kick off deployment project
On this page we will examine a sample deployment project, and work through the steps required to get a deployment project up and running.
Step 1: Create a deployment project
The first step in creating a deployment project is to associate the project with an existing build plan. This is done at the same time as creating the deployment project. To create a new deployment project, and associate an existing build plan with it:
- Click Create > Create deployment project in the drop down menu from the header bar. The 'Set up deployment project' screen will appear.
- Use the Source build plan to select an existing build plan. It will identify any relevant build plans in the menu:

In this example we can see that the associated build plan is the one for project Bonsai - Complete the Name and Description fields as required
- Click Create deployment project. Your deployment project will be created, and will automatically be associated with the build plan you selected above.
Step 2: Define the release naming scheme
The next step is to provide a version naming strategy for the deployment project. This will define how the deployment project will ascribe names to current and subsequent artifact bundles that it generates. See Naming versions for deployment releases for more information. To configure your version naming scheme:
- From the deployment project configuration screen, click Release versioning to display the deployment project release versioning screen:
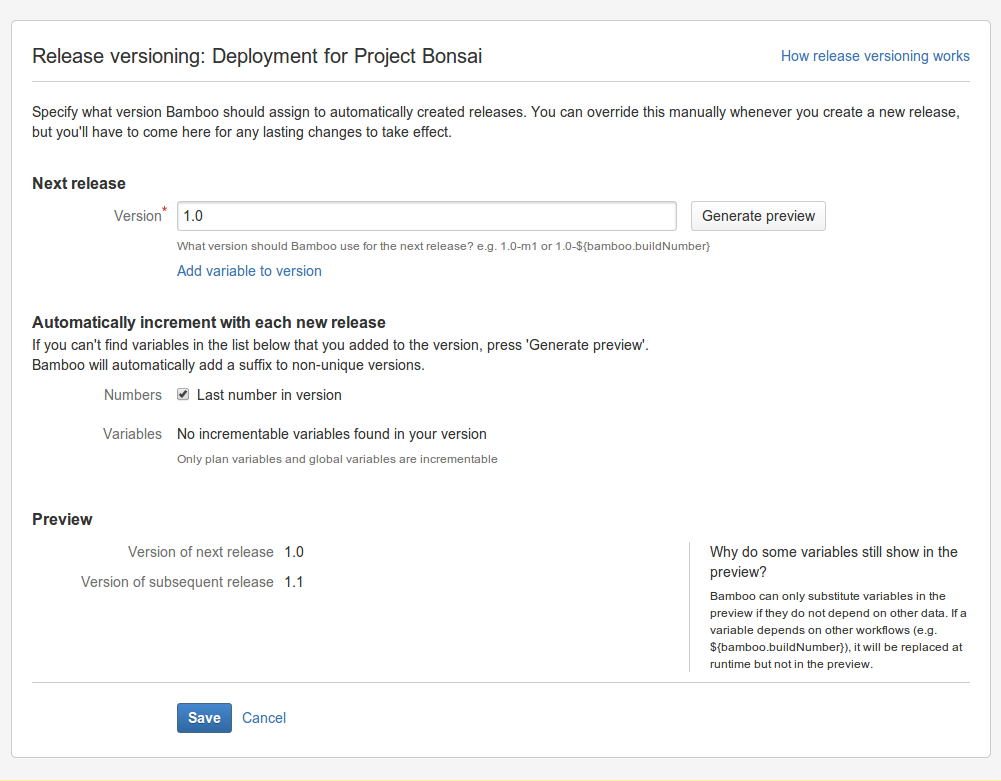
- Complete the required fields according to your naming scheme. In this example we can see that a simple naming scheme has been adopted - the next name will be 1.0, and the subsequent 1.1 etc
- Click Save to save your naming scheme.